

HivePress WordPress Directory Plugin
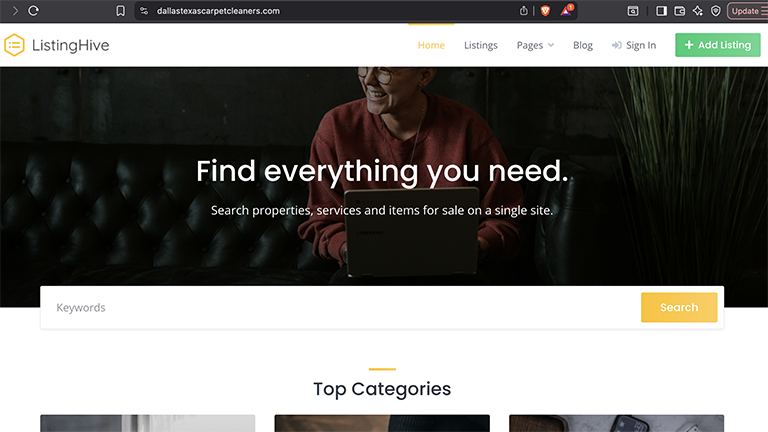
I built a fully functional demo WordPress directory website with the HivePress plugin and the ListingHive theme. In this blog post, I will show you the website and walk you through the steps to set up the website.
If you have any questions, feel to contact us.
How To Make A WordPress Directory Website With HivePress
I will walk you through the steps to build a WordPress directory website with HivePress with the ListingHive theme.
Table of Contents
What Is HivePress
HivePress is a free, open-source WordPress plugin that allows you to build directory, listing and classified and marketplace websites.
I built a fully functional demo website of a WordPress directory with the HivePress plugin and the ListingHive theme. In this blog post I walk through the steps of how to do it.
I followed this tutorial to make this demo WordPress directory website: youtube.com/watch?v=0OYJfYHq7ow&t=322s
Domain Name And Web Hosting
First you will need a domain name and web hosting. I recommend Godaddy.com for your domain names and NameCheap.com for your web hosting.
I also used Elementor to help me build the website easier and faster.
Step 1: Install WordPress
Once you have your domain name and web hosting set up, install WordPress on your domain name. You can check out this tutorial if you need help installing WordPress on your domain name.
Step 2: Install The ListingHive Theme
Next, install the ListingHive theme. Go To Appearance > Themes and click on the “Add Theme” button and click on, install and activate the ListingHive theme.
Step 3: Import The ListingHive Demo Content
Import the demo content to start with existing layouts instead of creating them from scratch.
Download this file from HivePress: ListingHive Demo Content. It should appear as “demo.zip” in your donwloads.
Open the demo.zip file. It should have three files in it: content.xml, customerizer.dat and widgets.wie
Once you have dowloaded the file, go to Appearance > Import Demo Data. This will take you to the “One Click Demo Import” page.
Go down to the “Manual Demo File Import” section. You are going to select three files to upload.
Under the “Manual Demo File Import” section, go to the “Import Content” box and click on the “Select a File” button and then select the file content.xml.
Under the “Manual Demo File Import” section, go to the “Import Widgets” box and click on the “Select a File” button and then select the file widgets.wie.
Under the “Manual Demo File Import” section, go to the “Import Customizer” box and click on the “Select a File” button and then select the file customizer.dat.
Then click on the “Continue & Import” button. The page will say “Importing Content”, and then it will “Import Complete!”.
There will be two buttons. One will say “Theme Settings”. One will say “Visit Site”. Click on the “Visit Site” button to take a look at your fully functional directory website with the demo content.
The website with the demo content that I have set up is: dallastexascarpetcleaners.com

We will build and design a website for you for free.