How To Install WordPress
This guide will walk you through the steps necessary to make a website with WordPress.
Once you install WordPress on your website, you can use WordPress to easily make your website.
Get A Domain Name
To have a website, you need a domain name first. To get a domain name, go to a domain name registrar to register a domain name for your website.
The cost to register a domain name for one year is about $13.
Get Web Hosting
Once you have a domain name, you will need to host your website on a server. This is called web hosting. The company that provides a web hosting service is called a web host, or a web hosting provider.
The cost for web hosting can range quite a bit. Also, some web hosting providers require you to pay yearly.
If you go with a web host that offers month-to-month web hosting, the cost is usually around $4 to $5 per month. If you choose to pay for the whole year, the cost will usually be around $40 to $50 for the whole year. This will vary depending on the each individual web host.
Get The DNS Servers Information (Domain Name Servers)
I’m skipping ahead a little bit here to save you some time. You will want to get the DNS servers information from your web host if you are going to point your domain name to your web host. If you get your web hosting through NameCheap and use either their Stellar or Stellar Plus plan, the DNS servers information is most likely going to be:
dns1.namecheaphosting.com
dns2.namecheaphosting.com
Point Your Domain Name To Your Web Host
Once you get your web hosting from a web host, you will want to have your domain name point to your web host.
I will guide you on how to install WordPress within NameCheap using their “One-Click Install”. The installation process should be very similar no matter what web host you use as long as they have “One-Click Install” for WordPress.
I will walk you through how to point your domain name to your web host in GoDaddy.com. The process should be similar if you register your domain name with any other domain name registrar.
First you have to register a domain name. In this example, we registered the domain name with GoDaddy. Once you have registered your domain name, log in and you will be at GoDaddy.com’s Hub Home page. From here, there are two “Domains” links on the page. One link is in the left hand menu, the other link is in the right hand menu. Click on either link.
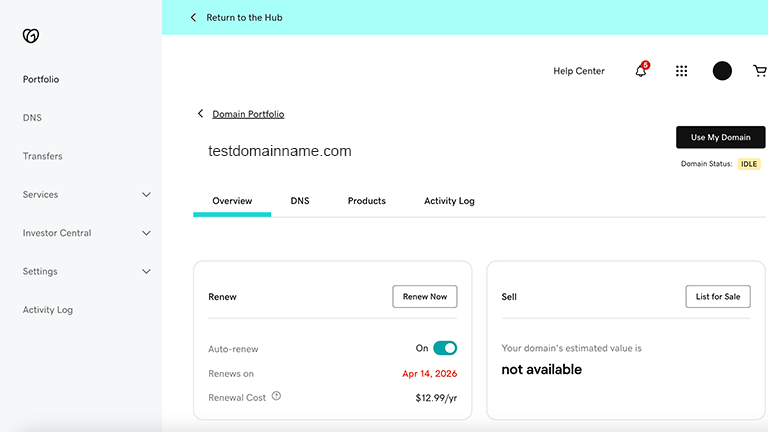
You will be taken to GoDaddy.com’s “Domain Portfolio” web page. From this web page, click on the domain name that you want pointed to your web host.
Once you have clicked on the domain name that you want to point to your web host, you will be taken to this web page, which I call GoDaddy’s domain name overview page. Click on the “DNS” tab when you are on this page.
Once you have clicked on the “DNS” tab of GoDaddy’s domain name overview page, you will be taken to that domain name’s DNS web page. From here, click on the “Nameservers” tab.
You should now be on domain name NameServers page. Now click on the “Change Nameservers” button.
When you click on the “Change Nameservers” button, you will get a popup with the text “Edit namerservers” at the top of it.
When this popup first pops up, there will be two radio button options. The top one, which will be “GoDaddy Nameservers (recommended)”, will already be selected. Click on the bottom radio button with the text “I’ll use my own nameservers”.
When you click on the radio button with the text “I’ll use my own nameservers”, two input fields will be appear below. You will need to put in your web host’s nameservers in the input fields and click on the “Save” button to save the changes.
Remember, if you get your web hosting with NameCheap and use either their Stellar plan or their Stellar Plus plan, the nameservers will be probably be:
dns1.namecheaphosting.com
dns2.namecheaphosting.com
Once you click on the “Save” button, you will be asked to click on the “Continue” button to confirm the changes to the domain name’s nameservers.
Now when you go to the “Nameservers” tab, you should see the text “Using custom nameservers” with the two DNS nameservers below. If you see this, your domain name is now pointed at your web host.
Add Your Domain Name To Your Web Host
Next, you will need to add your domain name to your web host. Within cPanel, scroll down to the “Domains” sections, and click on the “Domains” link.
Click on the “Create A New Domain” button on this page.
Once you are on this page, go to the “Create A New Domain” > “Domain”. Under the text “Enter the domain that you would like to create:”, enter your domain name in the input field, and then click the submit button.
It will take a few moments for your domain name to be added to your web host.
When you click on the “Submit” button, you should get a few popups. The popup at the top should say: ‘Success: You have successfully created the new “yourdomainname.com” domain..’.
Congratulations!
Your website should now be up. Go to the url of your website, and you should something like this:
Once your website is up, we can now move on to installing WordPress on your website.
Install WordPress
We will now show you how to set up WordPress on a website that is hosted by NameCheap using the Softaculous Apps Installer if you signed up for either NameCheap’s Stellar or Stellar Plus hosting plan.
The process should be similar if you host your website with another web host other than NameCheap.
To begin, you will need to log in to NameCheap. You will be in NameCheap’s dashboard. Once you are logged in, go to the navigation menu that is on the left side of the screen and click on “Hosting List”.
On the next page in the dashboard, click on the “GO TO CPANEL” button that is on the right side of the screen.
You should now be in your web host’s cPanel. From here, click on the “Softaculous Apps Installer” link.
When you click on the “Softaculous Apps Installer” link, it will take you to the Softaculous Apps Installer dashboard.
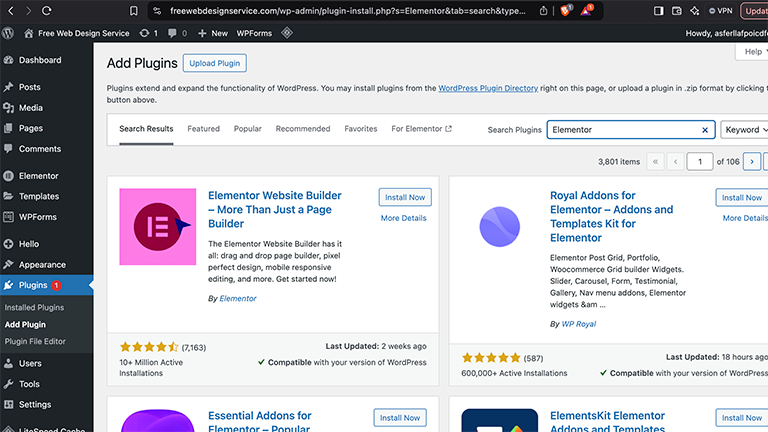
Once you are here, click on the “Install” button that is under WordPress.
When you click on the “Install” button, you will be taken to the Softaculous WordPress installation page. You will be asked to enter the “Site Name” and “Site Description”. You can change these later in your WordPress dashboard.
You will also be asked to enter a “Admin Username” and “Admin Password”. These will be important since they will be used to log in to your website’s WordPress dashboard.
You will be taken to a page that says “Congratulations, the Software was installed successfully”.
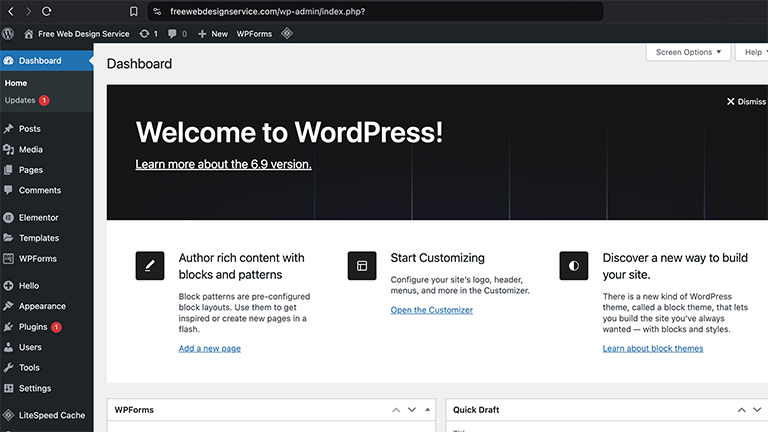
If you go to your website now, you should see that your WordPress has been installed on your website. Your website should look something like this:
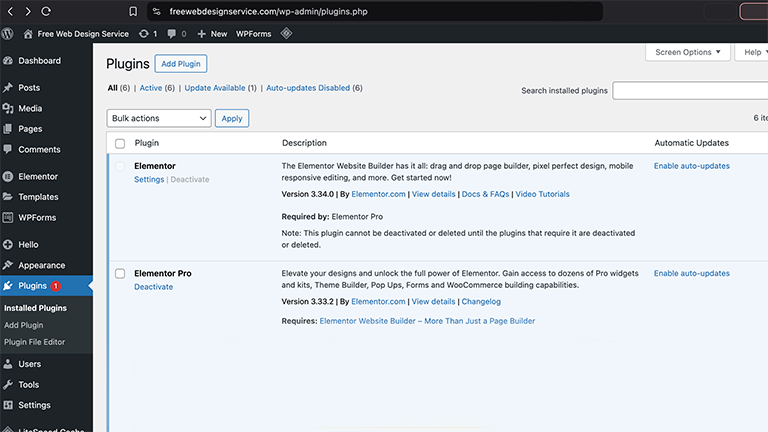
You can now set up your WordPress website.
If you would like us to set up and design your website for you, feel free to contact us.